Smooth the process with these PhotoShop tips for developers
Save time and make your designers happy!
A quick search on Google will show a plethora of tutorials on how to design a web page, or even an entire website, using PhotoShop. But here at Mr. WPress, we focus on the development side. While it may be worthwhile to have some background knowledge of what goes into designing a website, those skills may not help as much when trying to build a site based off of a PSD file provided by your designer. Instead of building something from scratch, developers need to know how to take an existing file and pull the information they need to create a website to match. We’ll cover some of the basics in this post, though this certainly isn’t the full extent of useful knowledge! But it is a solid foundation to make life easier for both you and the designers you work with as a web developer.
Pulling images and other assets
Let’s say you’ve got the design file – but your designer didn’t provide the separate assets like images. You could shoot another email over, but who knows how long it may take them to respond. Plus, you may have to wind up doing some optimization or tweaks anyway, since they likely won’t know exactly what you need. Thankfully, you can pull individual assets out of the file yourself with a little know-how!
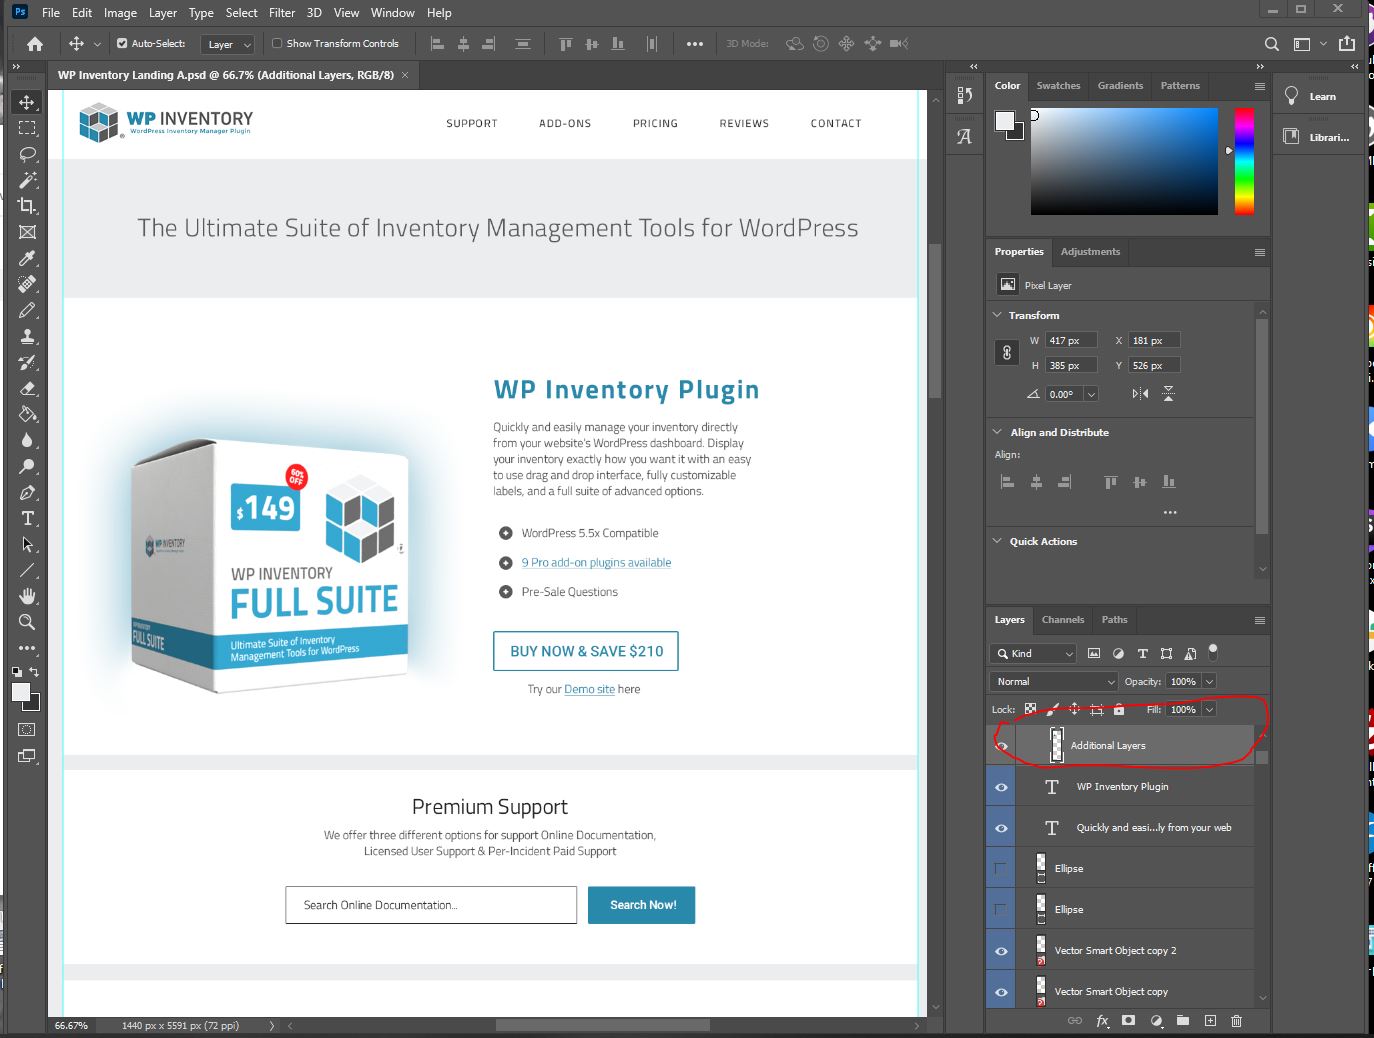
Let’s say, in the design below, we wanted to pull the image of the box. If you click on the box itself, you’ll notice that an item on the right becomes highlighted. This is called a “Layer” in Photoshop, a single entity in relation to the rest of the page. Right-click that Layer, and you should see an option in the resulting menu to “Export As.” Choosing that option provides you with a dialog box to configure how you want to export the layer in question, the most important of which is the file type. Choose PNG or JPG as needed, click Export, and your image is ready to go!
Thankfully, the design file we’re working with hasn’t been merged or compressed. You may receive a file in which there’s only one Layer, or very few. This is because it’s possible to “merge” layers, turning multiple individual items into just one entity in the eyes of PhotoShop. This reduces the file size, and discourages changes to the initial design. But in the web development case, it hinders what we’re able to pull. Reach back out to your designer to ask for the original design file.
Reading font attributes for CSS
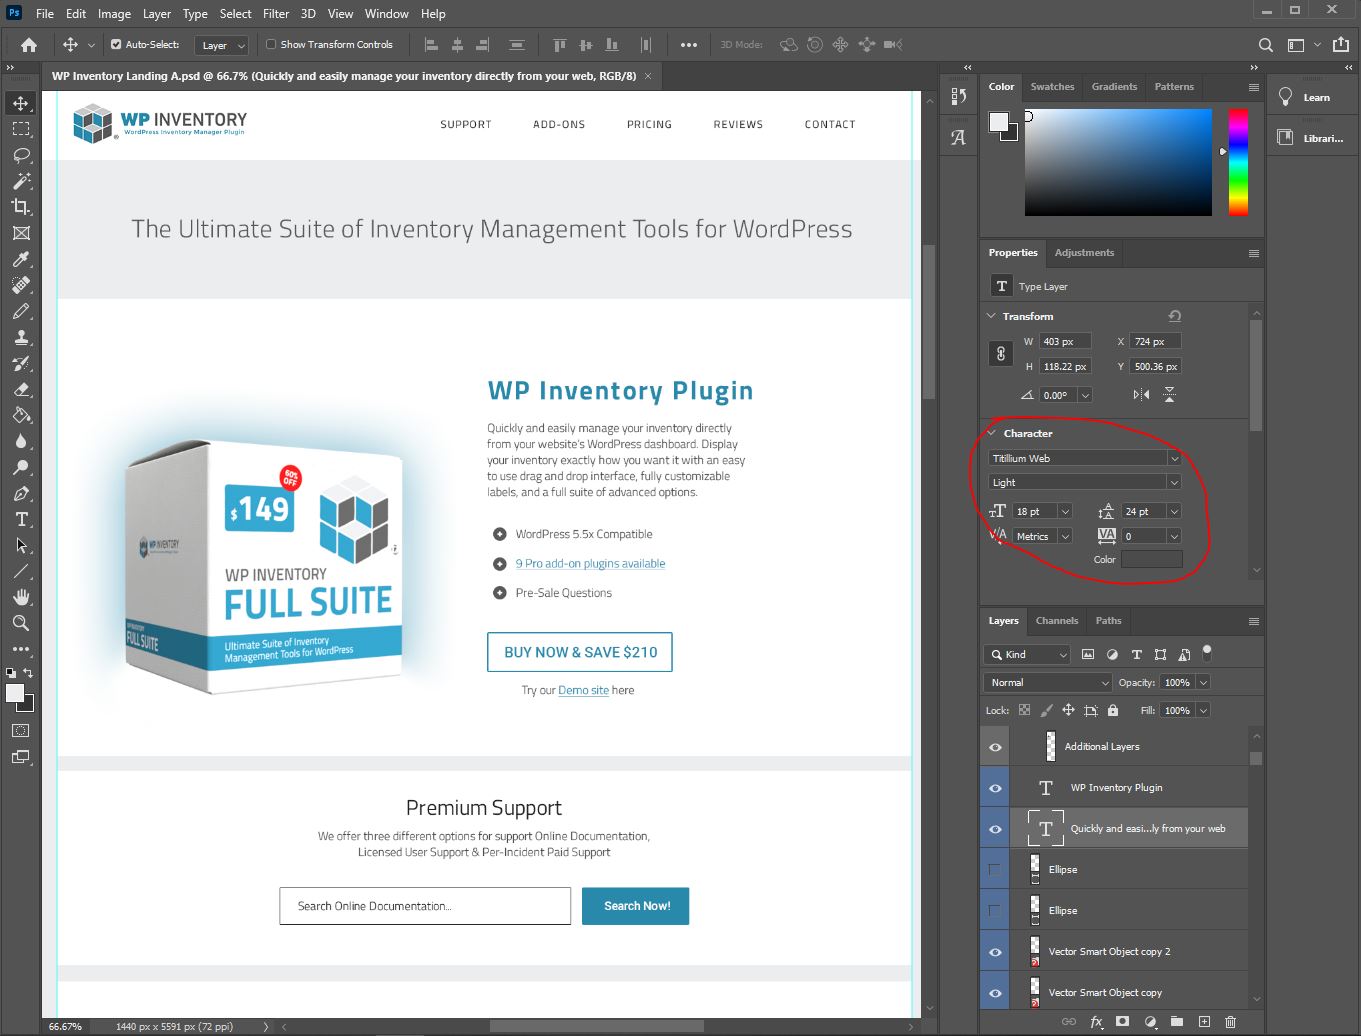
Pulling images is great and all, but text doesn’t work the same way. Sure, you can copy and paste, but you’ll just be getting the content. It doesn’t come inlaid with all the formatting, like font and size. That will still need to be done with CSS, and thankfully, PhotoShop gives you most of the information you need. Simply click the text like we did for the box before, and that layer of text will be highlighted. Take a look above the layer menu, and you’ll find the “Properties” section. The image, and any layer, has this same section, but it’s super-valuable for text layers.
You’re able to find the font family (Titillium Web in this case), the weight (Light), as well as the font size, line height, and letter-spacing (18pt, 24pt, and none respectively). Be sure to note that these size values are in points, and not pixels. You’ll need to run a quick conversion using a quick Google search or your favorite conversion tool. There isn’t an exact conversion, but this can put in the right area for the size needed. You can also find the color here – simply click the block of color next to the aptly named label, and a dialog box will pop up where you can read the hex code and RGB values.
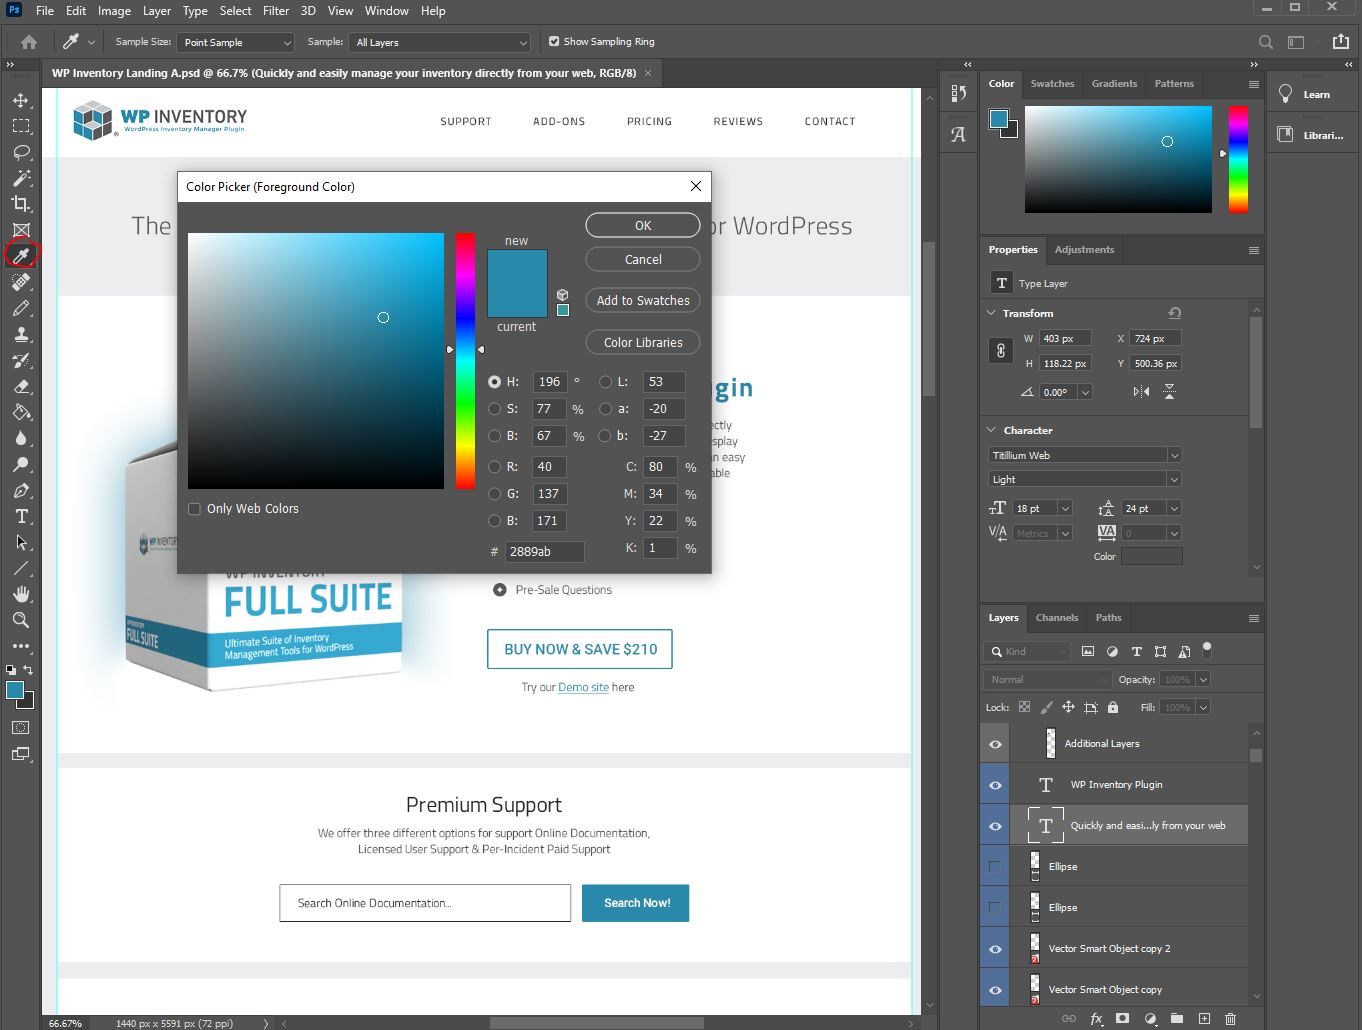
Find the color of anything!
Thankfully, you can find the color of more than just text! Let’s say we needed to pull the color of the background behind the white blocks. The Eyedropper tool is perfect for the job. Among the many options in the lefthand menu is a little eyedropper icon. Click this tool, and then click anywhere on the design. You can even click and hold, and drag the dropper to the exact pixel you need. But once you finish the click, the color box both at the bottom left and top right of the screen will update with the selected color. Click that new box, and you’ll get the same color picker tool as above where you can read the hex code and RBG values, ready to be formatted into CSS!
Measuring padding and margin
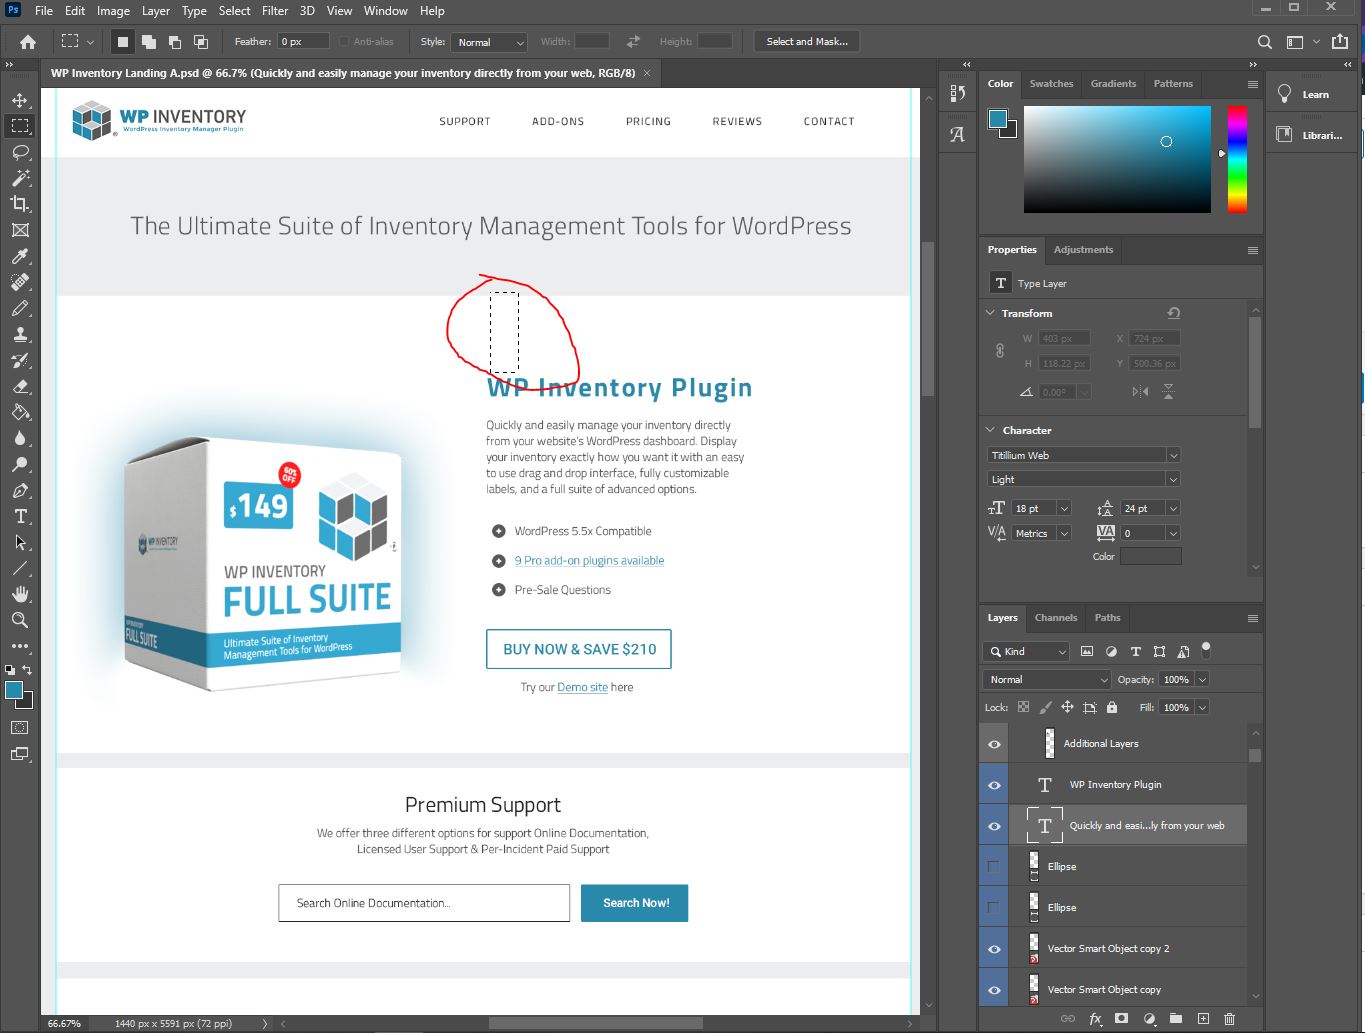
The last technique we’ll cover is measuring spacing, like padding and margin. Per the example image below, let’s say we wanted to measure the top padding of our first white section. We’ll break out another tool from the menu on the left, this time the Rectangle Marquee tool, second from the top. This allows you to select any given area of the file, and provides you with the height and width of that section. You can’t see the measurements in the screenshot, but by doing the same you’ll be able to read that top padding in pixels. It’s hard to get exact pixel measurements because of human error, but it can get you pretty close, and as long as you round you’ll have the padding the designer is looking for.
Need help building out a design, or looking to start from scratch? Don’t hesitate to reach out for a free quote! At Mr. WPress, we have years of experience building websites from designs, many of which are provided via PhotoShop.