Add Custom Features to Your Site with Advanced Custom Fields
Customize specific pages, post types, and more!
We’ve talked before about creating custom fields for custom post types in WordPress, but we just scratched the surface of the versatile plugin that makes it so easy: Advanced Custom Fields. Just like any other plugin, this can be added easily to any site right from your WordPress dashboard. But as soon as it’s up and running, you’ve instantly a wide range of flexible options to your web development. However, using this plugin to its full extent does require diving into your WordPress php files, and some familiarity with the HTML and PHP coding languages. But if you have moderate skill in web development, you’ll be able to create expansive pages (or page templates) that are easily customizable right from the WordPress dashboard.
This post is going to be a general overview of how to use this plugin, but you can find plenty of documentation on more specific use cases on the Advanced Custom Fields website.
Creating Fields and Field Groups
Once the plugin is installed and activated, you should see a new menu item in your WordPress dashboard for “Custom Fields” near the bottom. This is where you’ll navigate to start creating custom fields for different pages or posts. The first thing you’ll need to do is create a Field Group. You’ll mostly stay in the top three sections shown in the screenshot below, though there are some more advanced settings below if you need to specify some logistics.
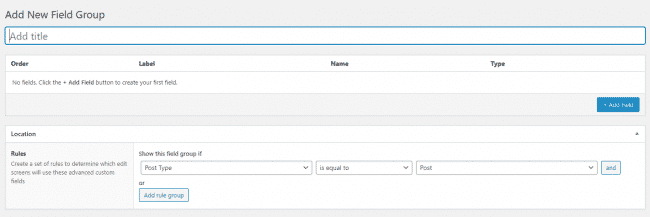
The Title is the name of the group, and it’s usually recommended to name it in relation to where the fields will be displaying (“Homepage Specific,” “Product Post Template,” etc.). The jumping to the third setting, you’ll set the Location of where these fields can be configured, and therefore displayed. There’s a wide range of options in those dropdowns – allowing you to specify a field group as broad or narrow as you need, from a single page to all pages.
Then we’ll jump back up to the fields themselves. Click the blue Add Field button, and you’re off to the races.
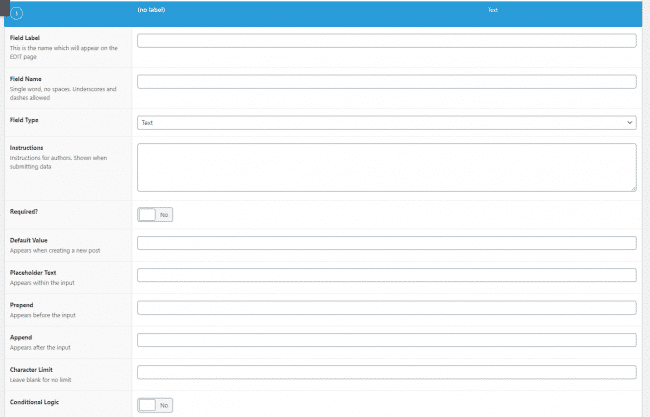
The most important settings here are the Label and Name (this is how you’ll refer to the field in the code later), and the Field Type. There are a multitude of options here, and you can pass along just about any kind of data supported by WordPress. Standard Text or Wysiwyg editors are most common, but you can restrict it to only allow emails or numbers, or even only allow users in your WordPress site.
You’ll need to think about what exactly you want to display on the frontend. Maybe you want a custom headline baked into the template for every post. Maybe you just want to create a video section on the homepage, with an easy way to change which video is featured. There are a wide range of options here, and the system is flexible enough to meet just about any need you could think of. So think through what you’ll need, and refer to the documentation if you need more details on different Field Types.
Setting and Displaying Field Info
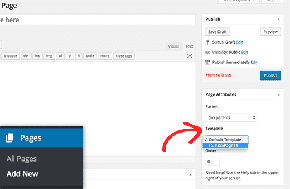
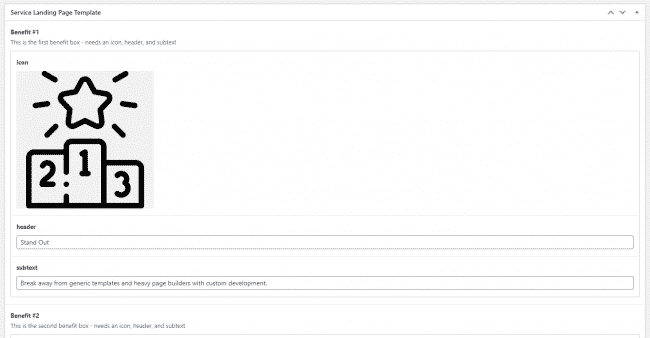
Once you’ve got your Field Group (and the Fields within) configured and ready to go, it’s time to start using them! To set them, just head to any Page or Post that you’ve specified the group to apply to (for example, if you set the Field Group to display on all blog posts, go edit an existing blog post). Scroll down below all the content, you should see a new box in the page attributes with the same name as your Field Group, and some empty fields to start filling in.
This is where you’ll enter custom data for the specific page. But for creating the template and calling that custom information, we’ll need to dive into the actual PHP files of your WordPress site. For the default pages and posts, you’ll be looking for page.php and single.php respectively. You can find these in your theme files, located in [YOUR SITE]/wp-content/themes/[YOUR THEME]. If you’re customizing a custom post type or a different page template, you’ll need the single-[custom].php or page-[custom].php instead.
Regardless, open the necessary file in your favorite code editor, and look for the the_content function call in the code. This is what displays the content you type into your page, and serves as home base for your edits. Want to create a custom header above the content? Add in the fields (which we’ll cover how to do that shortly) above the function. Want a testimonial slider below the content? Add in the field below that call.
Let’s say, as an example, that you wanted to add a custom closing headline below all the content. We’d create a text Field within our group, and specify the headline in the page attributes in WordPress. Now how do we edit the code to display it? There are two main methods, both built into the Advanced Custom Fields plugin. First is the function the_field( 'your_field_name' ), which reads the field and then displays the information it finds. When using this method, you may want to mark the relevant Field as required, or else you may end up with an empty section.
One way to get around that is through the second method, get_field. This method calls the value of the field, but then allows you to perform checks against the value (including whether it exists) before doing anything with it. A basic example would be:
$myText = get_field( 'your_field_name' );

if ( $myText ) {

echo $myText;

}
This calls the field value, and then checks if it exists before displaying the field. But as said, that’s just a basic example. You could do all kinds of checks against the value, and even do different things besides just echoing the value inside the if statement. The possibilities are truly limitless!
Do More with Pro Fields
Advanced Custom Fields is free to use, but if you want to do even more with these fields, you may want to consider the Pro version of Advanced Custom Fields. Our favorite added offering here is the Repeater field, which allows you to create variable sections that change size depending on how many items you enter.
Need help getting started with Advanced Custom Fields, or anything on your website? Don’t hesitate to reach out for a free quote! We’re WordPress experts at Mr. WPress, and that includes custom post types and fields. We want to help you create the perfect website!