Set up a local staging site for testing!
Show customers the best version of your site
With constantly evolving website trends and business growth, it’s never a bad time to consider a staging site. This is essentially a copy of your website where you can mess around with pages, install new plugins, add new features, and do anything you want. Since this version is stored separately from your live site, your customers won’t see it until you’re ready to deploy the new and improved version without any glitches or bugs. Even if more minor changes, it’s never a bad idea to implement them in a test environment first just to be sure. Websites are made up of a lot of moving parts, and you can never be sure what will affect what. Thankfully, setting up this test environment is easier than you might think! In fact, it only takes three simple steps.
Step 1: Configure Your Computer with MAMP
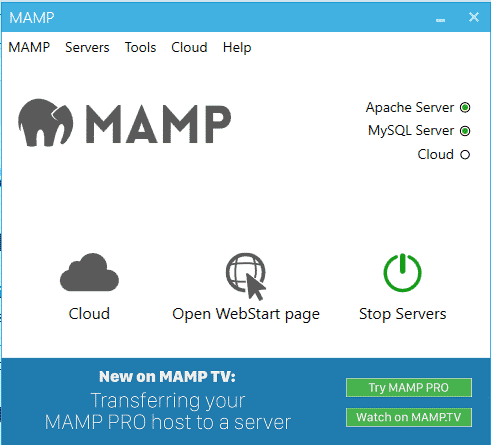
There are several options for getting your computer ready to act as a local server, but one of the easiest and most widespread for WordPress is a program called MAMP. MAMP is totally free, and sets up a server environment that’s localized to your computer. This means that only you can see the sites hosted on your local machine, so there’s no worry about customers stumbling upon a development site. The Pro version of MAMP comes with a few extra features, but the free version covers everything we’ll need.
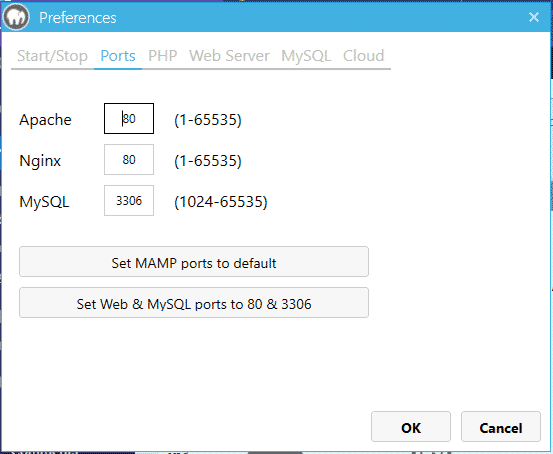
You can download and install MAMP for free, and it comes mostly configured right out of the box. For basic use, the only setting you’ll need to doublecheck is the Apache port. Once MAMP is installed and you have the dashboard open, click the MAMP item in the menu, and click preferences. Click over to Ports settings, and make sure your Apache port is set to 80. This allows you to access your sites more easily – which we’ll get to in the next steps!
Step 2: Create Your Site’s Database
Now that MAMP is up and running, your computer is ready to host staging sites! Now it’s just a matter of actually creating those sites. First step for any WordPress site is to create a database for all your information to be housed. Your live site has this too – this is where all of your pages, posts, users, and all the information unique to your site lives. Whether you want to create a site from scratch, or import a copy of your current site, the steps are the same.
- In your MAMP dashboard, click the “Open WebStart page” button
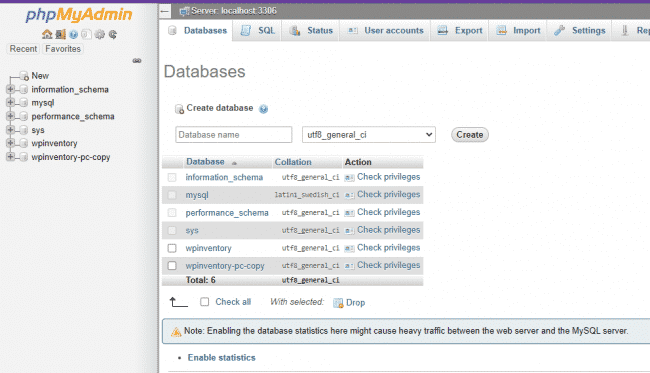
- On the Webstart page, click Tools up in the navigation bar, and then phpMyAdmin.
- On the left is a list of databases, and at the top is a button to create a new database. Simply enter a name (with no spaces) and click Create.
If you’re building your site from scratch, then you’re done! Your database is ready to be filled up with tasty WordPress information, and you’re ready for step 3. If you’d rather import a version of your current site, then there are a couple more steps to go through.
- Export a copy of your live database. The exact process for this varies depending on your hosting solution, but you’ll need to find your way to the phpMyAdmin for your live server. Your hosting solution should be able to help with this, as well as clarifying the name of the database you need. Once you’re there, and clicked on the database, you’ll click the option to Export up at the navigation bar. The default options of the Quick export method and SQL format are perfect.
- Once you have the SQL file, head back to your local phpMyAdmin through MAMP. After clicking on your newly created database, this time hit Import in the top navigation bar. Just drag and drop your file, hit GO down at the bottom, and that’s that.
Step 3: Install WordPress Locally
Now that we’ve got our information database setup, it’s time to get the functionality files. These are the core files and templates of WordPress that tell your site how to handle the information in your database from step 2. If you’re going for a fresh install, then you’ll want to download a fresh version of WordPress. Once it’s downloaded, you need to find your htdocs folder in your file explorer. This is a part of the MAMP program download, and should be found within those folders. If you’re on PC, navigate to your Local Disk (C:) and find the MAMP folder, and then htdocs. If you’re on Mac, your MAMP folder should be found within your Applications folders. Unzip the WordPress download, rename the file to the same name as your database, and then drop it into your htdocs folder.
For a copy of your live site, the process is largely the same, except instead of downloading new WordPress files, you’ll need a copy of the files from your live site. No matter your hosting platform, you should be able to access your site’s files through FTP protocol with a program like FileZilla. The exact configuration will be different depending on your hosting provider, but there should be documentation or support ready to assist you.
You’re Ready to Test!
Now you’ve got your local server, your WordPress information, and your WordPress functionality – you’re ready to go! Simply navigate to localhost/your-site-name in any browser, install WordPress if prompted (this will only take a minute), and you’ll have a local staging site! This acts just like any normal website – you can add new pages, install new plugins, test out new functionality, whatever you want! You’ll be the only one able to see it. If you want to go live with a big update, you simply go through the above copying process in reverse. Just be sure to include any new posts or updates you made on your live site so they don’t get lost.
Tools like GitHub can even help you work with others during the development process, but that’s going to look different for everybody’s needs. Need some help setting up your staging site, or just with development in general? Don’t hesitate to reach out to us at Mr. WPress for a free quote!