Creating Effective Google Ads – Part 2
Create high-performing, cost-effective Google Ads
In our latest blog post, we covered some definitions of the terms you’ll be running into when creating Google Ads. In this second step, we’ll move into the more practical steps on how to create high-performing and cost-effective campaigns. A quick teaser: bidding high is not always the best solution! At Mr. WPress, we want to help you create ads that enhance your brand and boost your bottom line instead of draining it.
Creating Campaigns and Ads
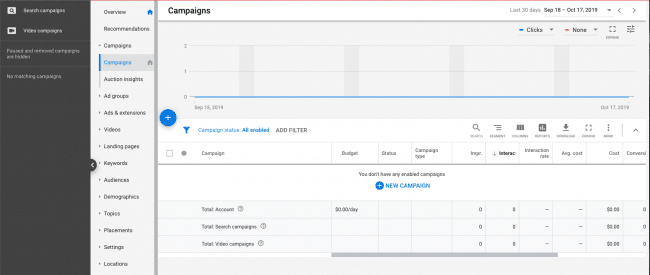
First things first, you’ll need to create a campaign. In your dashboard, on the lighter menu bar on the left, click ‘Campaigns’, and then click the blue plus symbol to create a new campaign. You’ll walk through a few steps to set your goals and the type of campaigns (covered in Part 1). After this, you’ll be able to rename your campaign and move on to the more detailed setup.

One of the most important factors in this process is defining your demographic criteria in the ‘Audiences’ section under ‘Targeting and audiences.’ Without these conditions, your ads will simply show to any person who happens to search the keywords you’ve defined. While the broad reach might appeal at first glance, it’s not the most cost-effective solution. You’ll want to get your website in front of the people most likely to actually purchase your product or service – you’re paying for every click, after all. While having researchers or hobbyists click on your link might boost the number of clicks, it will end up hurting the much more important stats like your conversion rate. And you’d even be paying for that to happen!
Clicking into the ‘Audience’ field and then the ‘Browse’ tab will break the main areas down for you: Who they are, What they are actively researching, and How they’ve interacted with your business. For instance, if you were a web developer like Mr. WPress, you may want to restrict your ads to people who are already in-market for web design and development, web hosting, or other similar services. We could even go as far as to target people who are Similar To people who have already visited our website, which Google bases on the people who have already interacted with our website. The specifics will be different for every person and every campaign, but this is a critical step to ensure your campaign steps out on the right foot.
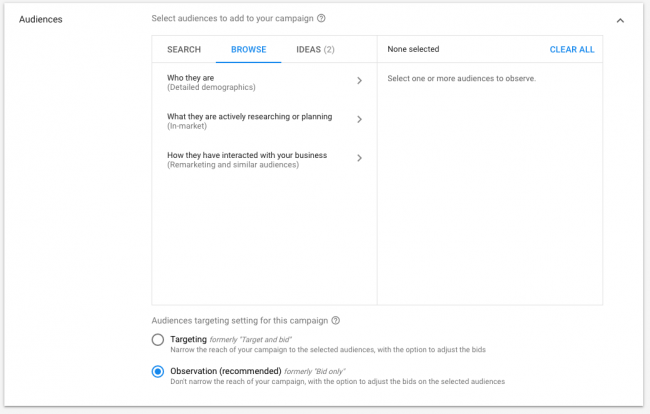
Don’t fret either – all of these conditions can be changed later if you change your mind! To continue your setup, you’ll need to set your maximum daily budget. However, this campaign won’t run until you explicitly enable it, and you’re free to change this budget at any time. If you’re not sure what you want to put here, or want to read the rest of this article to find our budgeting tips, feel free to put a placeholder amount here (like $0.01).
Carefully Choose Your Keywords
Once the initial setup of your campaign is completed, you’ll move onto individual ads. The focus of these ads is keywords, and you’ll need to provide the actual keywords you want to bid on. Much like the demographic criteria, it’s not a great idea to go for the widest reach possible. Using your target demographic as guidelines, you can choose specific and limited keyword phrases directed specifically at the niche you’re targeting. While this may limit your clicks, it will undoubtedly provide you with a decent conversion rate if done correctly. Even though you’re not showing up in quite so many searches, the searches where your ads do appear will be high-value, with a high probability of converting compared to more broad searches.
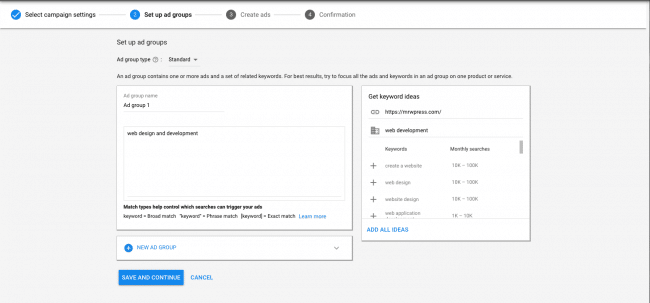
Again, keep in mind that you can change these at any time, so nothing is set in stone here. But for example, if Mr. WPress was creating these ads, we would pick keywords such as “small business WordPress website development” or “custom WordPress plugin creation.” The Google setup process provides a search box for you to look for more keyword ideas here – though we would recommend against clicking the “Add All Ideas” button per the reasons mentioned above.
We’ve already said it before, but it bears repeating: keep your keywords niche and specific! It might be easy to simply bid on “website development” and hope for the best, but this will certainly be less effective than the narrow and qualified phrase of “small business WordPress website development.” Something else to keep in mind here is that our example phrase will be in the queue for its individual parts too, like “WordPress website development” or “small business website development,” and even the broad “website development.” You won’t be restricted to the entirety of your keyword phrase, so there’s truly no downside.
After you choose your keywords, you’ll move into the actual copy and appearance of your ads, which all attribute to the following section…
Make Sure Your Ads Rank Well
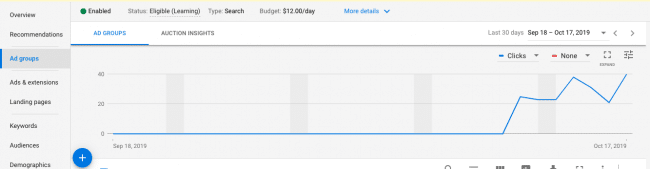
Once your ads are set up, navigate back to your list of campaigns, and you’ll see a column called ‘Optimization Score.’ Every ad is subject to Google’s ad ranking system, which is a percentage based evaluation on how effective Google things your ad will be. Much like with Google PageSpeed, 100% is a realistic goal! If you click on the blue number in the column, you’ll see a list of recommendations Google has to improve your score. This is important since it directly contributes to the likelihood of your ads being shown. If you have a 90% but your competitors have 100%, they’ll simply be more likely to be chosen by Google’s algorithm.

Control Your Keyword Bids…
Once you’ve got your list of keywords loaded into your campaign, you have the option to select your maximum bids for each keyword. Google can automatically bid for you if you so choose, but you can also set your bids on individual keywords manually. While the actual dollar amounts will be different for every circumstance, this is a great way to prioritize different keywords over others. If you feel a specific keyword phrase or two has a high chance to convert, you can set a higher maximum bid on those keywords in an effort to beat anybody who else who might be bidding on the keyword. Doing this, but keeping lower bids on less important keywords, will allow you to keep your overall budget down while highly focusing on your most powerful keywords.
With some consistent management, this is a great way to accurately test your different keywords, too. Checking in every day or every other day will allow you to see how your keywords and bids are trending, and those bids aren’t set in stone. If one keyword you had high hopes for ends up being a bust, don’t waste money waiting it out, just lower the bid! On the same token, if an unexpected keyword is getting a lot of traction, don’t be afraid to raise the bid to try to get it in front of more potentially-converting people.
…Under the Daily Budget Umbrella
All of the individual keyword bids happen within your maximum daily budget for the entire campaign. As soon as you click into a campaign, you’ll find the daily budget in a status bar at the top of the page. This is another effective tool that enables you to make sure any individual keyword doesn’t run out of control. You will set the specific limit of how much you’re willing to spend every day, so you won’t be caught by surprise, but this is another important reason to regularly check in on your campaign. If a low converting keyword is still getting lots of clicks, then it could be taking up most of your daily budget and stealing the focus from potentially more effective keywords. Lowering the bid or removing the keyword altogether could free up the budget for better testing and better chances for success.
One last note in regards to your budget – all things being equal, the highest bid will be the deciding factor. If you and another company are bidding on the same keyword, and have the same score in Google’s ad ranking, then the highest bidder will win the highest placement. This is why it’s important to choose specific and highly-relevant demographics and keywords, so you’re not competing on general keywords with the giants of the industry. And while reaching 100% with Google’s Ad ranking can help, it may not be the deciding factor if your competitor also has 100%. If you’ve followed all the steps to this point, but are still having trouble seeing results, the solution may be as simple as raising your bid. Just because bidding higher isn’t the best default course of action, doesn’t mean it’s always the wrong course of action.
Put Real Effort Into Your Website Landing Page
Getting people to click on your Google Ads is just the first step to converting. After they click, that doesn’t directly translate to a purchase. They’re taken to a specified page on your website, where they’re likely hoping to find more information on your product or service. More details on how to create an effective landing page will come up further along in this series, there are a few general tips you can start working with to make sure your hard-won bids aren’t going down the drain.
- The purpose of this page is to close the deal – they clicked on your ad, so they’re already interested! Really hammer home the benefits of your product or service, and what sets it apart from your competitors.
- Have a clear call to action – outline what you want your visitors to do. This doesn’t have to be a call to purchase! It could be to try a free trial, sign up for your newsletter, or any other number of things.
- Keep their options limited. It can easy to overwhelm people, so only have one call to action whenever possible, and keep your copy and other information limited to that call to action.
Good luck! Managing Google Ads is more of an art than a science, and more of a process than a ‘set it and forget it’ solution. The best way to find success is through continuous testing, and being willing to try new things. Of course, if you need help with any part of this process, don’t hesitate to reach out to us at Mr. WPress. We’re happy to provide tailored advice for your specific situation, or even help get your ads set up and rolling.